This post is also available in:
 Français (French)
The map has always been at the heart of Airlines Manager, but now it allows you to do much more than just observe your air empire. In this article, you’ll see how to use the Finder map to find and use the best routes for your favorite aircraft!
How to open/close the Finder map
To switch from the Radar map to the Finder map, press the map button, then press the Finder button.

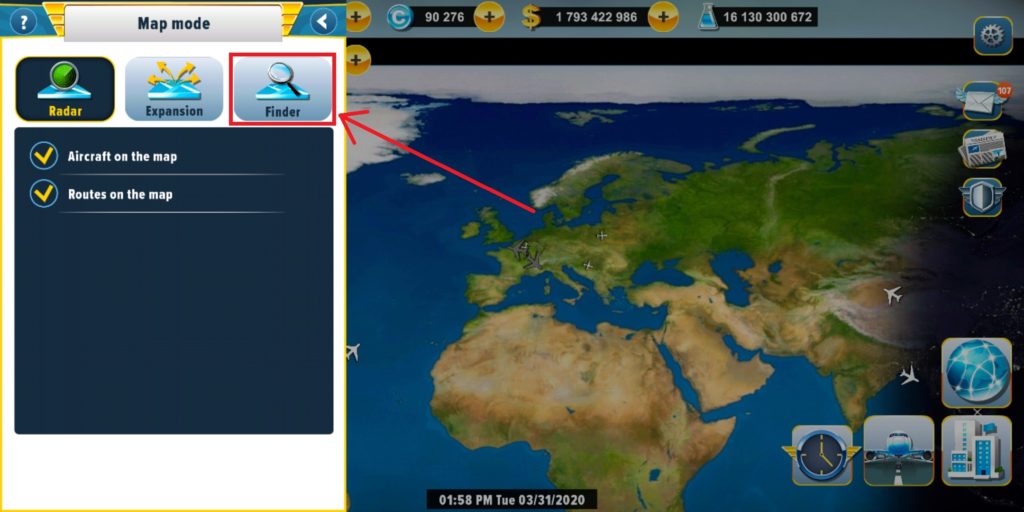
To exit the Finder map, press the map button again, then press the Radar button.
How to understand the Finder map
On the Finder map, all the airports in the game become visible. Depending on your zoom level, airports can either be indicated directly by a bubble with their IATA code or grouped together in a bubble indicating the number of airports present in the geographical area concerned.
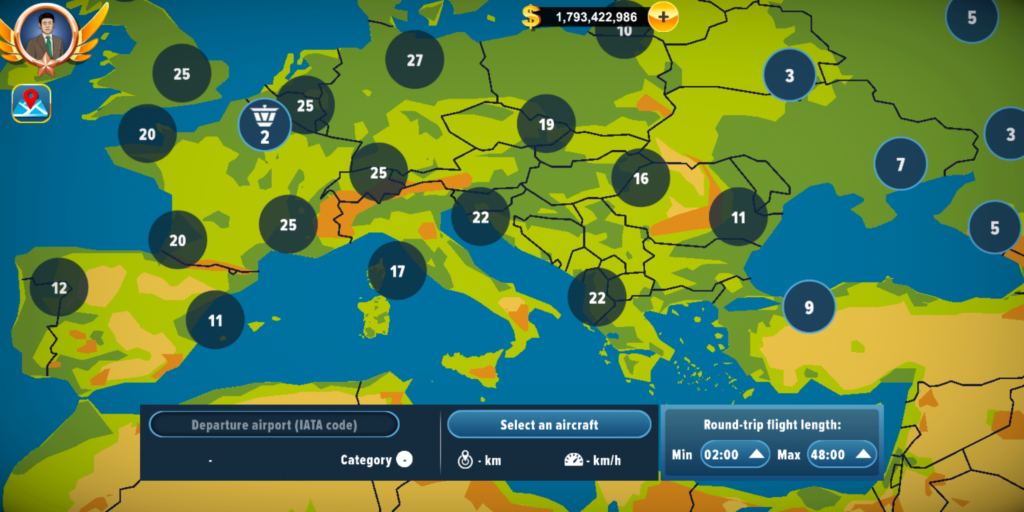
Airports are represented by different icons:

How to use the Finder map
To find the best routes for an airport, you have to select:
- A departure airport
- A reference aircraft
- The flight duration of your choice
To select an airport:
- If the airport is directly visible (bubble indicating the IATA code of the airport), simply press it.
- If the airport is in a “small group” (bubble indicating 10 airports or less), you can simply press the bubble. The list of airports present in the geographical area concerned will open on your screen. In this list, the airports and routes you own always appear first.
- If the airport is in a “large group” (bubble indicating 10 or more airports), you can zoom in or tap the corresponding bubble to automatically zoom in on the geographical area concerned until you can see your airport.
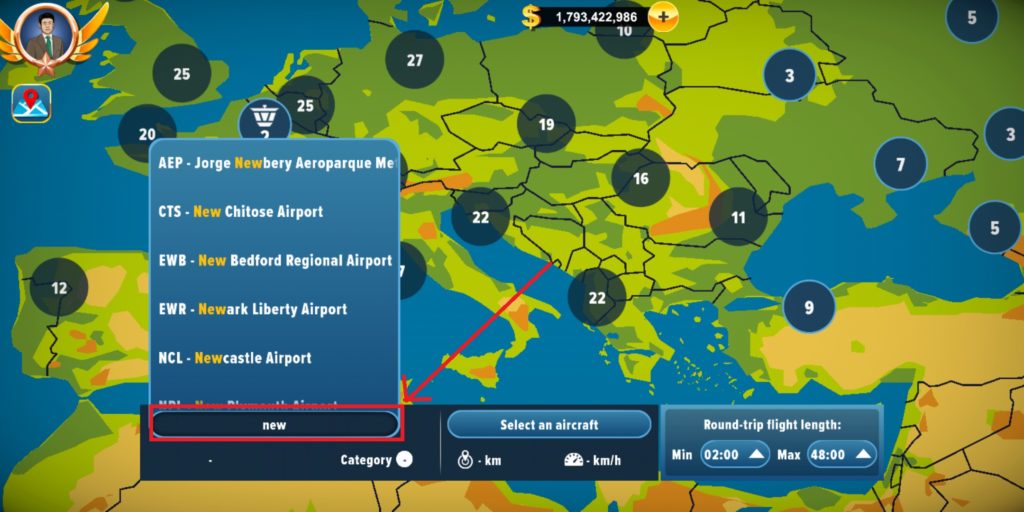
- Enter the IATA code or the name of the airport in the text box provided.
To select a reference aircraft, press Select an aircraft.
From this point on, aircraft selection has the same process as the classic aircraft purchase.
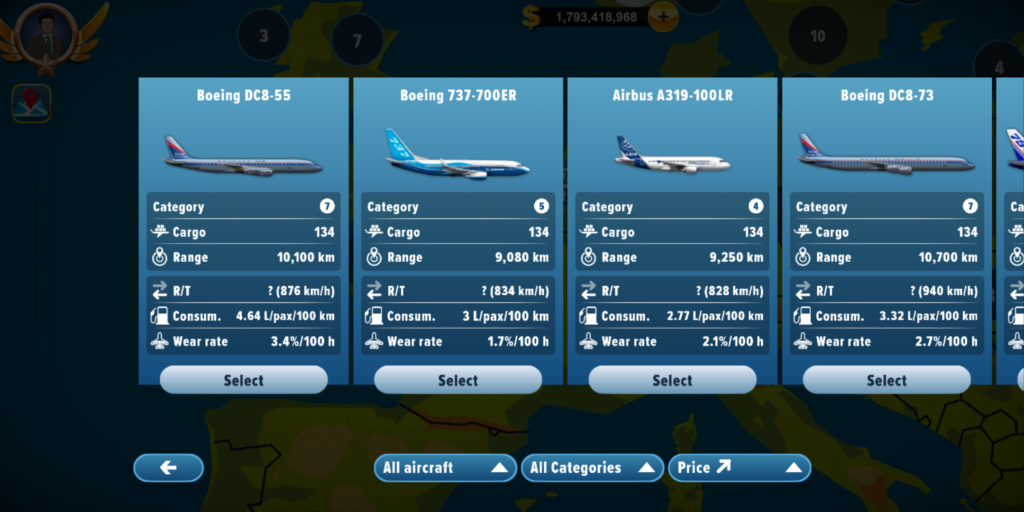
Sorting tools provide access to a more or less wide choice of aircraft.
It is for example possible to select an aircraft you have not yet unlocked in order to study the routes for your future strategy.
To deselect an airport, tap it again or press the X button on the left side of the navigation bar.
To close only the presentation box, press the X button in the upper right corner of the box.
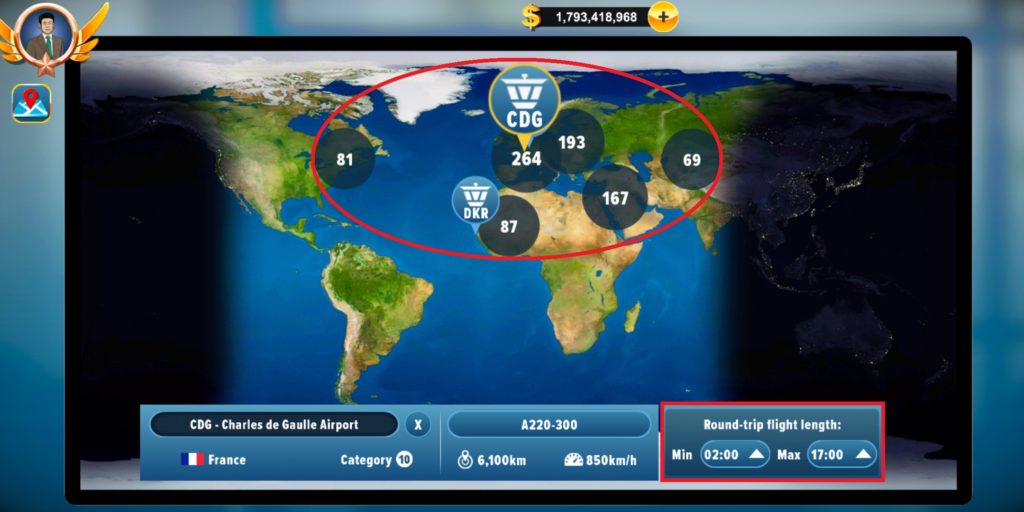
Once these items are selected, the radius is displayed. The radius represents the distance that the selected aircraft can fly from the selected hub for a round trip flight.
All airports shown on the map are therefore airports that this aircraft can fly to from your hub.
You can change the size of this radius via the Round-trip flight length filter to purchase routes that will have the duration of your choice: very handy for filling your schedules with precision!
How to expand your network
Now that you know how to navigate the Finder map, let’s see what you can do.
To select a route, select an owned airport and then select a destination airport. The route selection box appears:
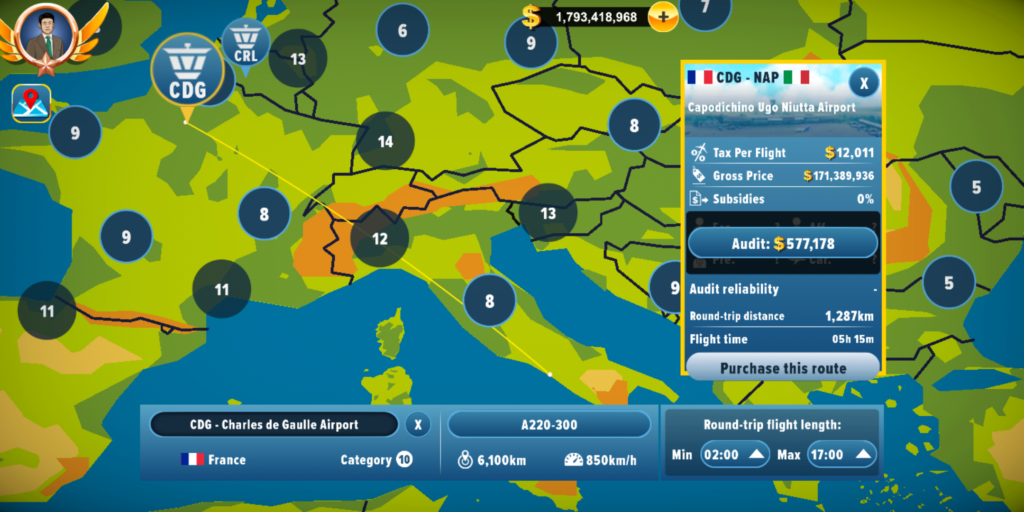
Via the route box, you can:
- Perform an Audit,
- Purchase this route if you don’t already own it.
If the route is already part of your network, you can view information about it by tapping the Route details button.
To be continued…
The Finder map will be enriched during the next updates, stay tuned not to miss anything!