This post is also available in:
 Français (French)
The map has always been at the heart of Airlines Manager, but now it allows you to do more than just watch your air empire. In this article, you’ll see how you can use the Expansion map to expand your network interactively without opening any menus.
How to open the Expansion map
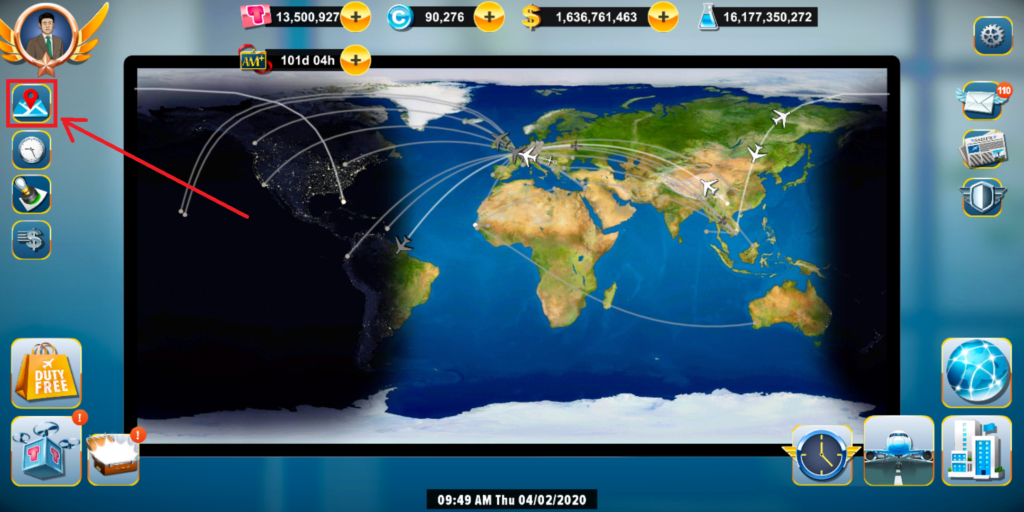
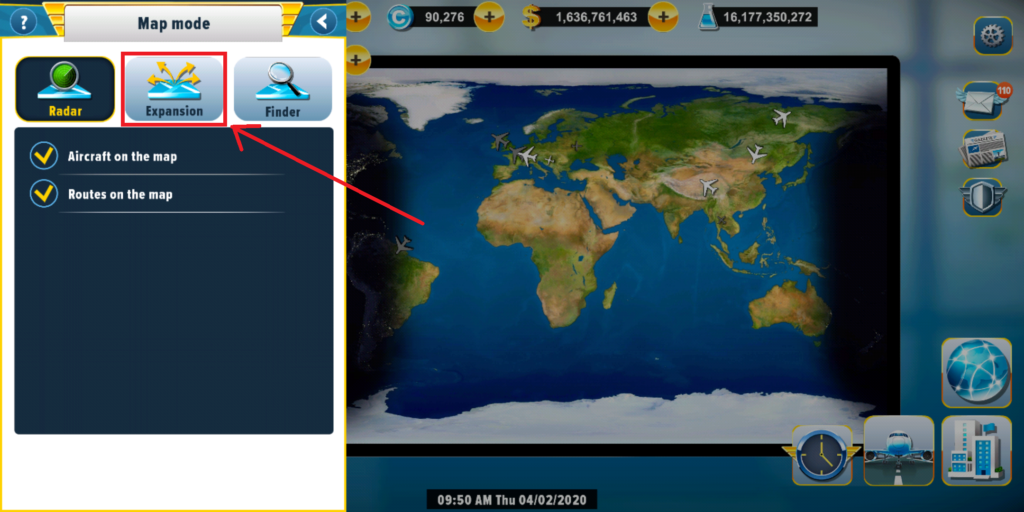
To switch from the Radar map to the Expansion map, press the map button and then the Expansion button.
When you are on the Expansion Map, the main buttons to access the game menus usually located at the bottom left and bottom right of the screen disappear to give you maximum visibility on the map and give way to a navigation bar.
To exit the Expansion card, press the map button again, then press the Radar button.
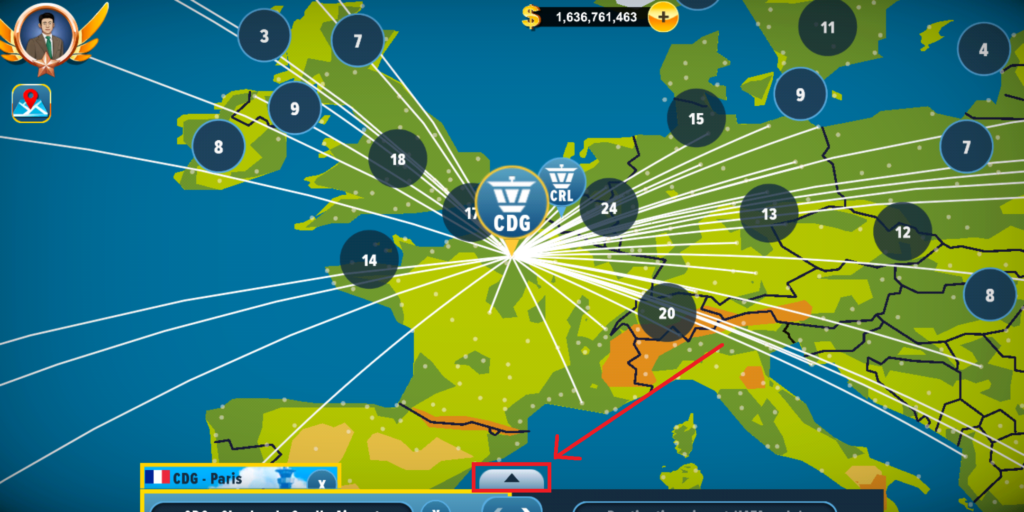
On the Expansion map, all the airports in the game become visible. Depending on your zoom level, airports can either be indicated directly by a bubble with their IATA code or grouped together in a bubble indicating the number of airports present in the geographical area concerned.
Airports are represented by different icons:

How to browse the Expansion map
To get information about an airport, you must first select the airport. There are several ways to do this:
- If the airport is directly visible (bubble indicating the IATA code of the airport), simply press it.
- If the airport is in a “small group” (bubble indicating 10 airports or less), you can simply press the bubble. The list of airports present in the geographical area concerned will open on your screen. In this list, the airports and routes you own always appear first.
- If the airport is in a “large group” (bubble indicating 10 or more airports), you can zoom in or tap the corresponding bubble to automatically zoom in on the geographical area concerned until you can see your airport.
Once the airport you want to select is visible, press it. A yellow border appears around the airport icon and around the left side of the navigation bar. In addition, a new presentation box containing information about the selected airport opens on the left side of your screen.

To deselect an airport, tap it again or press the X button on the left side of the navigation bar.
To close only the presentation box, press the X button in the upper right corner of the box.
In addition, you can reduce or enlarge all information elements by tapping the arrow above the navigation bar.
How to manage your network
Now that you know how to navigate the Expansion map, let’s see what you can do.
When you select an airport, its presentation box appears. If you want to open a closed presentation box again, tap the left side of the navigation bar.
Via the presentation box you can :
- view the Routes list of the airport if you already have it ;
- perform an Audit and/or Purchase as a hub this airport if you do not already own it.
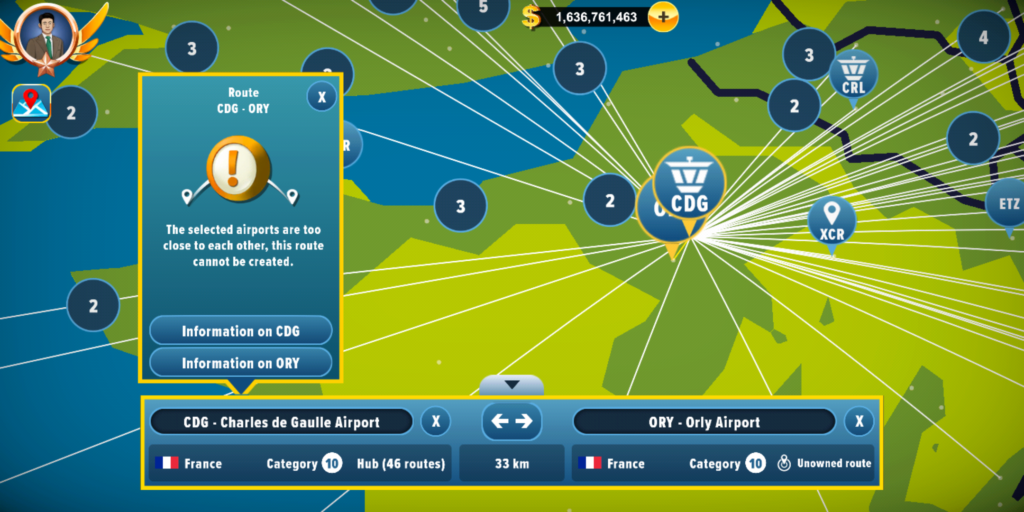
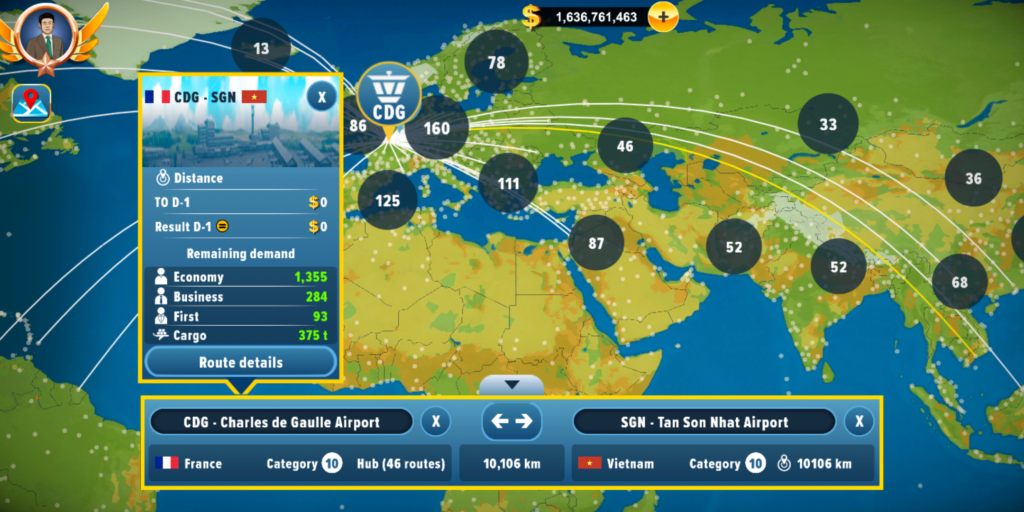
To select a route, select an owned airport and then select a destination airport. The yellow border surrounds the navigation bar and information about the destination airport is displayed on the right-hand side of the navigation bar. In addition, the distance to the route is shown in the center of the navigation bar. Furthermore, the route’s presentation box appears on the left side of your screen.
If the route is already part of your network, you can view information about it by tapping the Route details button.
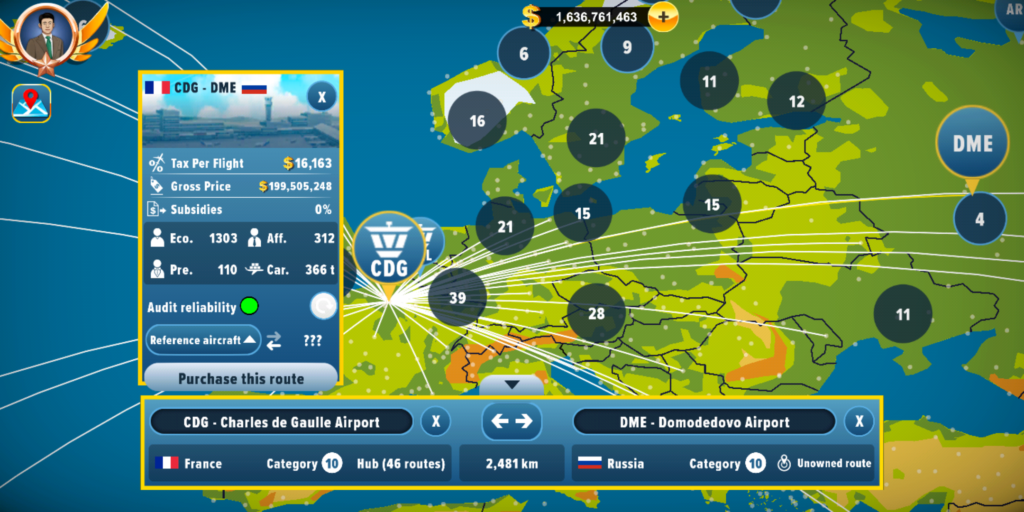
If you don’t have the route yet, you can:
- perform an audit;
- purchase the route;
- use the Reference Aircraft filter. Simply press the filter to open a drop-down list containing all aircraft compatible with the route. Once the aircraft is selected, the round trip flight time for the selected aircraft is displayed to the right of the filter.
Special cases
According to the game’s rules, purchasing a hub or a route is impossible if:
- the hub and the destination airport are too close to each other,
- neither of the two selected airports is owned as a hub,
- you’re trying to open a route from an affiliate hub.
In all the cases listed above, a message will be displayed in the presentation box and will suggest you to perform a authorized action such as consulting the information of the selected airports.